



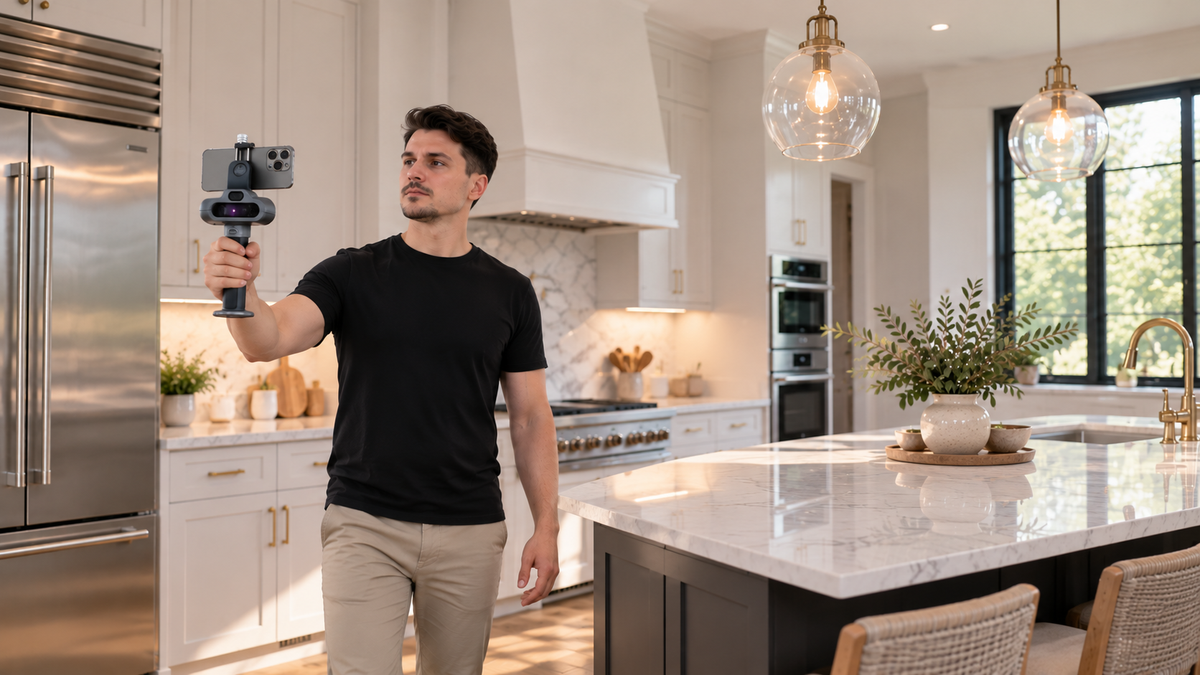
A successful kitchen remodel starts with an accurate record of the existing room. Before choosing cabinets, moving appliances, pricing countertops, or changing plumbing, the project team needs a kitchen floor plan that shows the walls, openings, services, fixed obstacles, and dimensions that control the new layout.
This kitchen measurement guide explains how to document the room systematically, verify the dimensions that affect fit, and organize the results for designers, cabinet suppliers, and renovation contractors.
Why accurate kitchen measurements matter
Kitchens combine architecture, cabinetry, appliances, utilities, ventilation, work surfaces, and circulation in a relatively small space. A missed wall return or an incorrect appliance opening can affect several parts of the design at once.
Reliable kitchen renovation measurements help the team:
- Create an accurate existing kitchen floor plan
- Check whether the proposed cabinet run will fit
- Coordinate doors, windows, appliances, plumbing, gas and power
- Estimate countertops, backsplashes, flooring and finishes
- Identify conditions that require further investigation
- Reduce avoidable design changes and repeat site visits
A room scan or measured plan is still an existing-conditions record. Dimensions used for fabrication, ordering, structural work, code compliance, or final installation should be verified to the tolerance required by the responsible supplier or contractor.
Tools for measuring a kitchen
| Tool | Best used for | What to watch |
|---|---|---|
| Tape measure | Cabinet widths, short offsets, trim, recesses and appliance openings | Long measurements can be slower and harder for one person to hold accurately |
| Laser distance meter | Wall lengths, ceiling heights and quick verification measurements | Each reading still needs a clear label and correct location on the plan |
| Sketch or tablet | Recording wall sequence, dimensions, services and field notes | Unclear labels can make correct measurements difficult to interpret later |
| Camera or phone | Finishes, fixtures, utilities, concealed areas and installation context | Photographs alone do not provide dependable dimensions |
| Indoor LiDAR scanner | Capturing connected room geometry and creating a digital spatial record | The scan must be reviewed, and project-critical dimensions still need verification |
How to measure a kitchen for remodeling
Define the project scope and required output
Decide what the measurement must support before starting. A preliminary layout needs less detail than custom cabinetry, stone fabrication, structural changes, or a full permit drawing set.
Confirm whether the next person needs a dimensioned sketch, an existing kitchen floor plan, an editable DXF, elevations, a 3D model, or a complete existing-conditions package. This determines what must be measured and verified onsite.
Draw a simple plan and number the walls
Sketch the kitchen from above. The drawing does not need to be to scale, but it should show the room shape and the order of the walls. Mark doors, windows, openings, columns, chimney breasts, wall returns, recesses and angled corners.
Choose a starting corner and label each wall in one direction around the room. Use the same wall labels for measurements, photographs and notes so every item has an obvious location.
Measure the overall room shape
Measure every wall from corner to corner, including short returns and recesses. Record the total length of each wall as well as the smaller segments created by openings or fixed elements.
- Overall wall lengths
- Short wall returns beside doors and windows
- Recesses, projections, columns and boxed services
- Angled or curved wall sections
- Connections to dining rooms, halls or utility spaces
Do not assume opposite walls are parallel or that every corner is 90 degrees. Older kitchens and remodeled properties often contain small variations that affect long cabinet or countertop runs.
Locate doors, windows and openings
Measure each opening and its position along the wall. A useful method is to record the distance from a fixed corner to the near edge of the opening, the opening width, and the distance from the far edge to the next corner.
For doors, note the frame width, door swing, threshold and any trim that affects cabinets or circulation. For windows, record the width, height, sill height, head height, depth of the reveal and whether the window projects into the room when opened.
Measure existing kitchen cabinets
When learning how to measure kitchen cabinets, separate the cabinet run into individual units rather than recording only one total length. Measure the visible width, height and depth of base cabinets, wall cabinets, tall units, panels, fillers and open spaces.
- Overall length of each cabinet run
- Width of each cabinet, filler and end panel
- Base, wall and tall cabinet heights
- Cabinet and countertop depths
- Distance from countertop to wall cabinets
- Position of sinks, cooktops and built-in appliances
- Overhangs, scribes, corner fillers and clearance spaces
If the existing cabinets will be removed, distinguish between dimensions that describe the current installation and dimensions that describe the walls behind it. Do not assume the visible cabinet run equals the available wall length.
Record appliances and required clearances
Measure the actual appliance body and the opening around it. Record the make and model where possible because installation requirements can differ even when two appliances have the same nominal width.
Include refrigerators, ranges, cooktops, ovens, microwaves, dishwashers, wine coolers, ventilation equipment and freestanding appliances. Note door and drawer swings, handles, ventilation gaps, service zones and adjacent obstructions. Final clearances should be checked against the appliance manufacturer’s installation instructions and applicable project requirements.
Capture vertical dimensions
A kitchen floor plan cannot explain every condition that affects cabinets and appliances. Add vertical measurements and, when needed, prepare wall elevations.
- Finished floor-to-ceiling height at more than one location
- Soffit, beam and bulkhead heights and depths
- Window sill and head heights
- Door and opening heights
- Existing countertop and backsplash heights
- Wall cabinet height and distance from the ceiling
- Changes in floor or ceiling level
Check for sloping floors and ceilings where full-height units, tall panels or tightly fitted millwork are planned.
Document plumbing, electrical, gas and HVAC
Locate services from a consistent reference point such as a room corner or finished floor level. Record what is visible and clearly label anything that could not be confirmed.
- Hot and cold water supplies, waste pipes and shutoff valves
- Gas connections and meters where applicable
- Outlets, switches, lighting points and dedicated appliance connections
- Extractor ducts, vents, radiators and HVAC grilles
- Electrical panels, access panels and service chases
Do not infer concealed routes from the visible connection alone. Plumbing, electrical, gas and structural changes should be assessed by the appropriate qualified professional.
Check irregularities and critical fit dimensions
Look for conditions that a simple wall measurement may miss: out-of-square corners, bowed walls, uneven floors, deep trim, protruding pipes, tile build-up, sloping ceilings and obstructions hidden by appliances.
Use diagonal or control measurements where they help confirm the room shape. Verify narrow openings, full-height cabinet locations, appliance spaces, sink centers and other dimensions that directly affect ordering or installation.
Create and review the kitchen floor plan
Transfer the field information into a clear existing-conditions plan. Check the overall dimensions against the sum of the smaller wall segments. Confirm that openings, cabinets, appliances and services appear on the correct walls.
If the plan will continue into CAD, verify units and scale after export. Keep the original scan, photographs and field notes so the team can revisit unusual conditions without relying on the plan alone.
Kitchen measurement checklist
| Area to document | Measurements and information to capture | Why it matters |
|---|---|---|
| Room geometry | Wall lengths, returns, recesses, angles, columns and adjoining openings | Creates the base kitchen floor plan |
| Doors and windows | Position, width, height, sill, head, reveal depth, trim and swing | Controls cabinet placement and circulation |
| Cabinetry | Individual units, fillers, panels, run lengths, heights and depths | Supports layout review and replacement planning |
| Appliances | Actual dimensions, model details, openings, swings and service zones | Reduces conflicts with adjacent units and access |
| Vertical conditions | Ceiling, soffit, beam, sill, head, countertop and wall cabinet heights | Supports elevations and tall-unit planning |
| Utilities | Visible plumbing, gas, electrical, ventilation and HVAC locations | Supports coordination and scope planning |
| Critical checks | Appliance openings, sink centers, full-height units and fabrication dimensions | Confirms the dimensions most likely to affect fit |
Using C1 for kitchen laser scanning
FJD Trion C1 is designed for indoor floor-plan work. It combines LiDAR room capture, visual context and a built-in laser distance meter in one kitchen measurement workflow.
Walk through the kitchen with C1 and the Creative app while maintaining coverage around cabinets, islands and openings.
Inspect the generated floor-plan draft and highlighted coverage gaps before leaving the property.
Use the built-in laser to check selected dimensions that control the design or installation.
Edit walls, doors, windows and room boundaries in Creative Portal, then export a DXF or floor-plan report.
C1 can capture up to 2,153 sq ft (200 m²) in approximately three minutes under stated conditions. Its published post-processing relative accuracy is 0.39 in (1 cm), while the built-in laser is rated to ±0.12 in (±3 mm). Actual results depend on the space, surfaces, scanning path and operating conditions. These specifications do not replace project-specific verification.
When another FJD Trion workflow may fit
V4e Go
Choose V4e Go when the remodeling project extends beyond the kitchen and may include multiple rooms, exterior context or broader 3D deliverables. It can use the Creative workflow for indoor plans or continue through FJD Trion Scan and Model Web.
P2
FJD Trion P2 is better suited to larger or more advanced reality-capture projects where the team needs a professional handheld scanning workflow beyond a focused kitchen survey.
Creative Portal and Model Web
Creative Portal supports browser-based floor-plan refinement. Model Web supports compatible cloud-processing workflows and broader outputs.
FJD Trion Model for PC
FJD Trion Model desktop software supports point-cloud processing and professional downstream workflows. It is relevant when the project needs more detailed point-cloud handling or CAD and 3D production beyond a browser-based kitchen floor plan.
Common kitchen measurement mistakes
Recording only overall wall lengths
Overall dimensions do not show where openings, returns, cabinets and services occur. Record the complete wall and its individual segments.
Assuming the room is square
Small angle changes can create visible gaps or tight fits along long cabinet and countertop runs. Check the geometry rather than forcing it into right angles.
Using nominal appliance sizes
A nominal width does not describe handles, ventilation, door swing or the manufacturer’s installation requirements. Record the model and actual conditions.
Ignoring vertical conditions
Ceiling slopes, soffits, beams, window sills and uneven floors can affect tall cabinets, wall units, splashbacks and ventilation.
Missing services behind cabinets
Document visible connections and access points before demolition. Clearly identify anything that could not be inspected.
Treating a scan as final fabrication data
Use the scan to preserve spatial context and develop the plan. Verify every dimension that controls fabrication, ordering or installation.
Frequently asked questions
What measurements do I need for a kitchen remodel?
Measure the complete room shape, wall segments, doors, windows, ceiling heights, soffits, cabinets, countertops, appliances and visible utilities. Add direct checks for dimensions that control cabinet fit, appliance installation, fabrication or construction.
How do I measure kitchen cabinets correctly?
Measure each cabinet, filler, panel and open space individually. Record width, height and depth, then compare their combined length with the overall cabinet run. Also note countertop overhangs, wall cabinet heights, appliance openings and corner clearances.
Should kitchen measurements be taken before or after demolition?
Measure the existing kitchen before demolition to support design and estimating. If cabinets or finishes conceal walls, services or structural conditions, plan a second verification after demolition before final fabrication or installation.
Is a laser measure enough for a kitchen floor plan?
A laser measure is useful for wall lengths, ceiling heights and critical checks, but each reading must be connected to a clear sketch or digital plan. A LiDAR scan can preserve more of the room’s spatial context while a laser verifies selected dimensions.
Can C1 create an editable kitchen floor plan?
Yes. Capture the kitchen with C1 and the Creative app, review the generated floor-plan draft, refine the project in Creative Portal, and export an editable DXF or floor-plan report.
Do I still need to verify measurements after laser scanning?
Yes. Review scan coverage and verify dimensions that affect cabinet fabrication, appliance fit, structural work, safety, codes or final installation. Choose a verification method and tolerance appropriate to the decision being made.
Should I use C1 or V4e Go for a kitchen remodel?
Choose C1 when the main goal is a focused indoor measurement and floor-plan workflow with built-in laser checks. Choose V4e Go when the project also needs broader multi-room, indoor-and-outdoor, point-cloud or 3D deliverables.
Turn kitchen measurements into an editable floor plan
Capture the existing kitchen with C1, review coverage onsite, verify selected dimensions with the built-in laser, and refine the plan in Creative Portal.
Products for this workflow


FJD Trion C1
Focused indoor capture for editable floor plans and selected laser checks.
Explore More

FJD Trion V4e Go
Flexible indoor and outdoor capture for floor plans and broader 3D work.
Explore More
FJD Trion Creative Portal
Refine walls, openings and room boundaries in a browser-based workspace.
Explore More
FJD Trion Model Web
Cloud processing for compatible floor-plan, point-cloud and 3D workflows.
Explore More
FJD Trion C1 vs. V4e Go: Which Scanner Fits Your Workflow?